
How To Make A Tattoo Stencil
We know creating a great tattoo takes time, effort, and imagination. Your design won’t, however, appear as you’d like it to on your customer’s skin if you don’t use a high-quality stencil. Creating a tattoo stencil is an essential first step in realizing your vision, and it doesn’t have to be challenging.
In this article, we’ll provide a comprehensive guide on how to make a tattoo stencil that will help you produce quality work. Further, you can check out our recent article about using stencil machines.
How To Make A Tattoo Stencil With A Regular Printer
Having all the supplies needed to construct a tattoo stencil is crucial before we move on to the significant parts of the process.
The supplies you need are listed below:
- – A top-notch printer explicitly made for printing high-quality stencils.
- – Transfer or stencil paper.
- – A highly pigmented marker or pen.
- – Vaseline or gel for stencil transfers.
- – Tape aids in attaching the transfer or stencil paper to the skin.
- – Scissors are used to trim any extra paper after printing.
Step-by-step Guide on how to make stencils for tattoos
This Guide will help you understand how tattoo artists make stencils.
Step 1: Prepare the Design
Before making the stencil, you must have a design that matches the customer’s requirements. The tattoo can be created from scratch, using an existing structure, or copying a picture online. When downloading an image, ensure it has an excellent and pixel-free resolution. Save the design on your computer by downloading it.
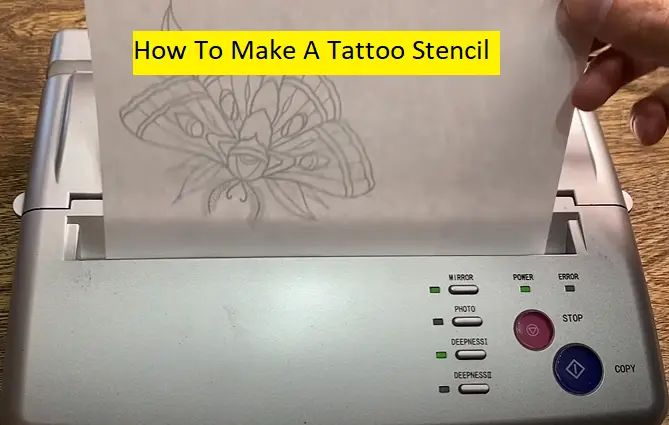
Step 2: Print the Design on Transfer Paper
Print your design onto the transfer paper once you’ve chosen or created it. Fill your printer with the tattoo transfer paper, and print the design in a size that will accommodate the customer’s preferred tattoo location. Most tattoo stencil machines allow you to change the design’s height.
Step 3: Prepare the Skin
Applying the stencil requires cleaning the skin’s surface. Make sure there is no oil or other substance in the surrounding area. Shave the area surrounding the tattoo to remove any hair that might prevent the stencil from sticking to the skin properly.
Step 4: Transfer the Design onto the Skin
The pattern may be transferred using petroleum jelly or stencil transfer gel. Apply transfer gel or petroleum jelly to the area that will be tattooed. Apply the transfer paper there, face down, and press gently. To make sure the pattern transfers accurately, lightly touch the transfer paper.
Step 5: Remove the Stencil Paper and Leave it to Dry
Massage the design into the skin until smooth, then carefully peel off the stencil paper. Wipe any extra petroleum jelly or transfer gel with a fresh paper towel.
Step 6: Trace the Stencil
The stencil is finally finished! Start by tracing the stencil onto the skin with your colored marker or pen. Verify the design’s correctness once again before starting the tattooing procedure.
Step 7: Start Tattooing!
Congratulations! You are currently ready to start inking. To create an exact design, keep following the trace you produced.
how to make a tattoo stencil with regular paper

Here’s how to make a tattoo stencil with printer paper and how to print tattoo stencils:
Step 1: Find or create your tattoo design
Find or make a tattoo design as your first step. You may sketch it yourself or go online for ideas. Make sure the tattoo’s design is the appropriate size for the location on your body.
Step 2: Print out the design
Use a laser printer to print out your creation. This is crucial since inkjet printers won’t function with this procedure. Ensure the design is printed at the appropriate size, with a dark and clear print.
Step 3: Cut out the design
Cut out the pattern from the standard paper using scissors. Because you’ll subsequently be applying the way to your skin, cut it as precisely as possible.
Step 4: Apply deodorant to your skin
Deodorant should be lightly applied to the region where the tattoo will be placed. By doing so, the pattern will stick better to your skin and transfer more easily.
Step 5: Place the design on your skin
The part of the skin where you want the tattoo should be placed face-down over the cut-out pattern. Remove all wrinkles or air bubbles.
Step 6: Wet the paper and let it sit
Gently moisten the paper pattern with a damp cloth or paper towel. Avoid soaking the paper in ink since this might make the ink scatter. Allow the paper to rest for a while after it has been wetted.
Step 7: Peel off the paper
Strip the paper off slowly, beginning at one corner. Your skin should have picked up the ink from the design.
Step 8: Trace the design and clean up
Using a fine-tipped pencil or marker, the pattern should be traced onto your skin. As this will serve as your tattoo’s guide, carefully trace all of the design’s lines. After you’ve outlined the pattern, use a moist cloth to wipe away any marks or imperfections.
how to print tattoo stencil with an inkjet printer
Even without a fax machine or thermal, an inkjet printer can generate a tattoo stencil. Unfortunately, The procedure can take a little longer. Both inkjet and laser printers work just fine with the tattoo transfer paper.
How to print stencils?
Step1
Before printing your tattoo design, you must ensure the computer is linked to the printer. Then, just like with ordinary paper, you must load the tattoo transfer paper into the printer. If using carbon paper, make sure it is loaded correctly.
Step2
Print your design and let it dry thoroughly before touching it to prevent blurring. The tattoo design may then be carved out, being careful not to cut too near the design edges.
Step3 .
After that, you’re prepared to apply your design on the skin. Paste perfume or stencil ointment should be used on the skin to fully prepare it for the tattoo pattern transfer.
people also asks:
Conclusion
By creating a tattoo stencil, you may ensure that your design is correctly applied to your customer’s skin. You may make a tattoo stencil that delivers the precision and accuracy necessary to accomplish the ideal tattoo design by using the correct equipment and taking cautious measures. You’ll surprise yourself with the improvement you make if you keep practicing.